Photography Tips for Beginners Using a Smartphone
Introduction
Photography is no longer limited to expensive cameras and professional equipment. Thanks to modern smartphone technology, anyone with a phone in their pocket can become a photographer. Whether you’re snapping vacation memories, creating content for social media, or simply capturing the beauty of everyday life, your smartphone can do the job — if you know how to use it well.
This guide is designed especially for beginners who want to level up their smartphone photography. You’ll learn simple, effective tips to take better pictures without needing fancy gear. So, grab your phone, clean that camera lens, and let’s get started!
1. Clean Your Camera Lens – Seriously!
It might sound basic, but it’s one of the most overlooked tips. Our phones go everywhere with us — from pockets to purses to kitchen counters — collecting fingerprints, dust, and smudges on the lens.
Tip:
Before you take a picture, quickly wipe the camera lens with a soft cloth or the corner of your shirt. You’ll be surprised at how much clearer your photos will look.
2. Use Natural Light Whenever Possible
Lighting is everything in photography. The flash on your phone often creates harsh, unnatural lighting that can ruin the look of your shot.
Tip:
Try to use natural light from windows or the outdoors. Early morning and late afternoon (golden hour) are perfect for soft, warm lighting that adds magic to your photos.
3. Tap to Focus and Adjust Exposure
Most smartphones let you tap the screen where you want the camera to focus. When you tap, a sun icon often appears — this is your exposure control.
Tip:
Tap your subject to focus, then slide the sun icon up or down to brighten or darken the shot. This gives you more control over how your image turns out.
4. Use the Rule of Thirds
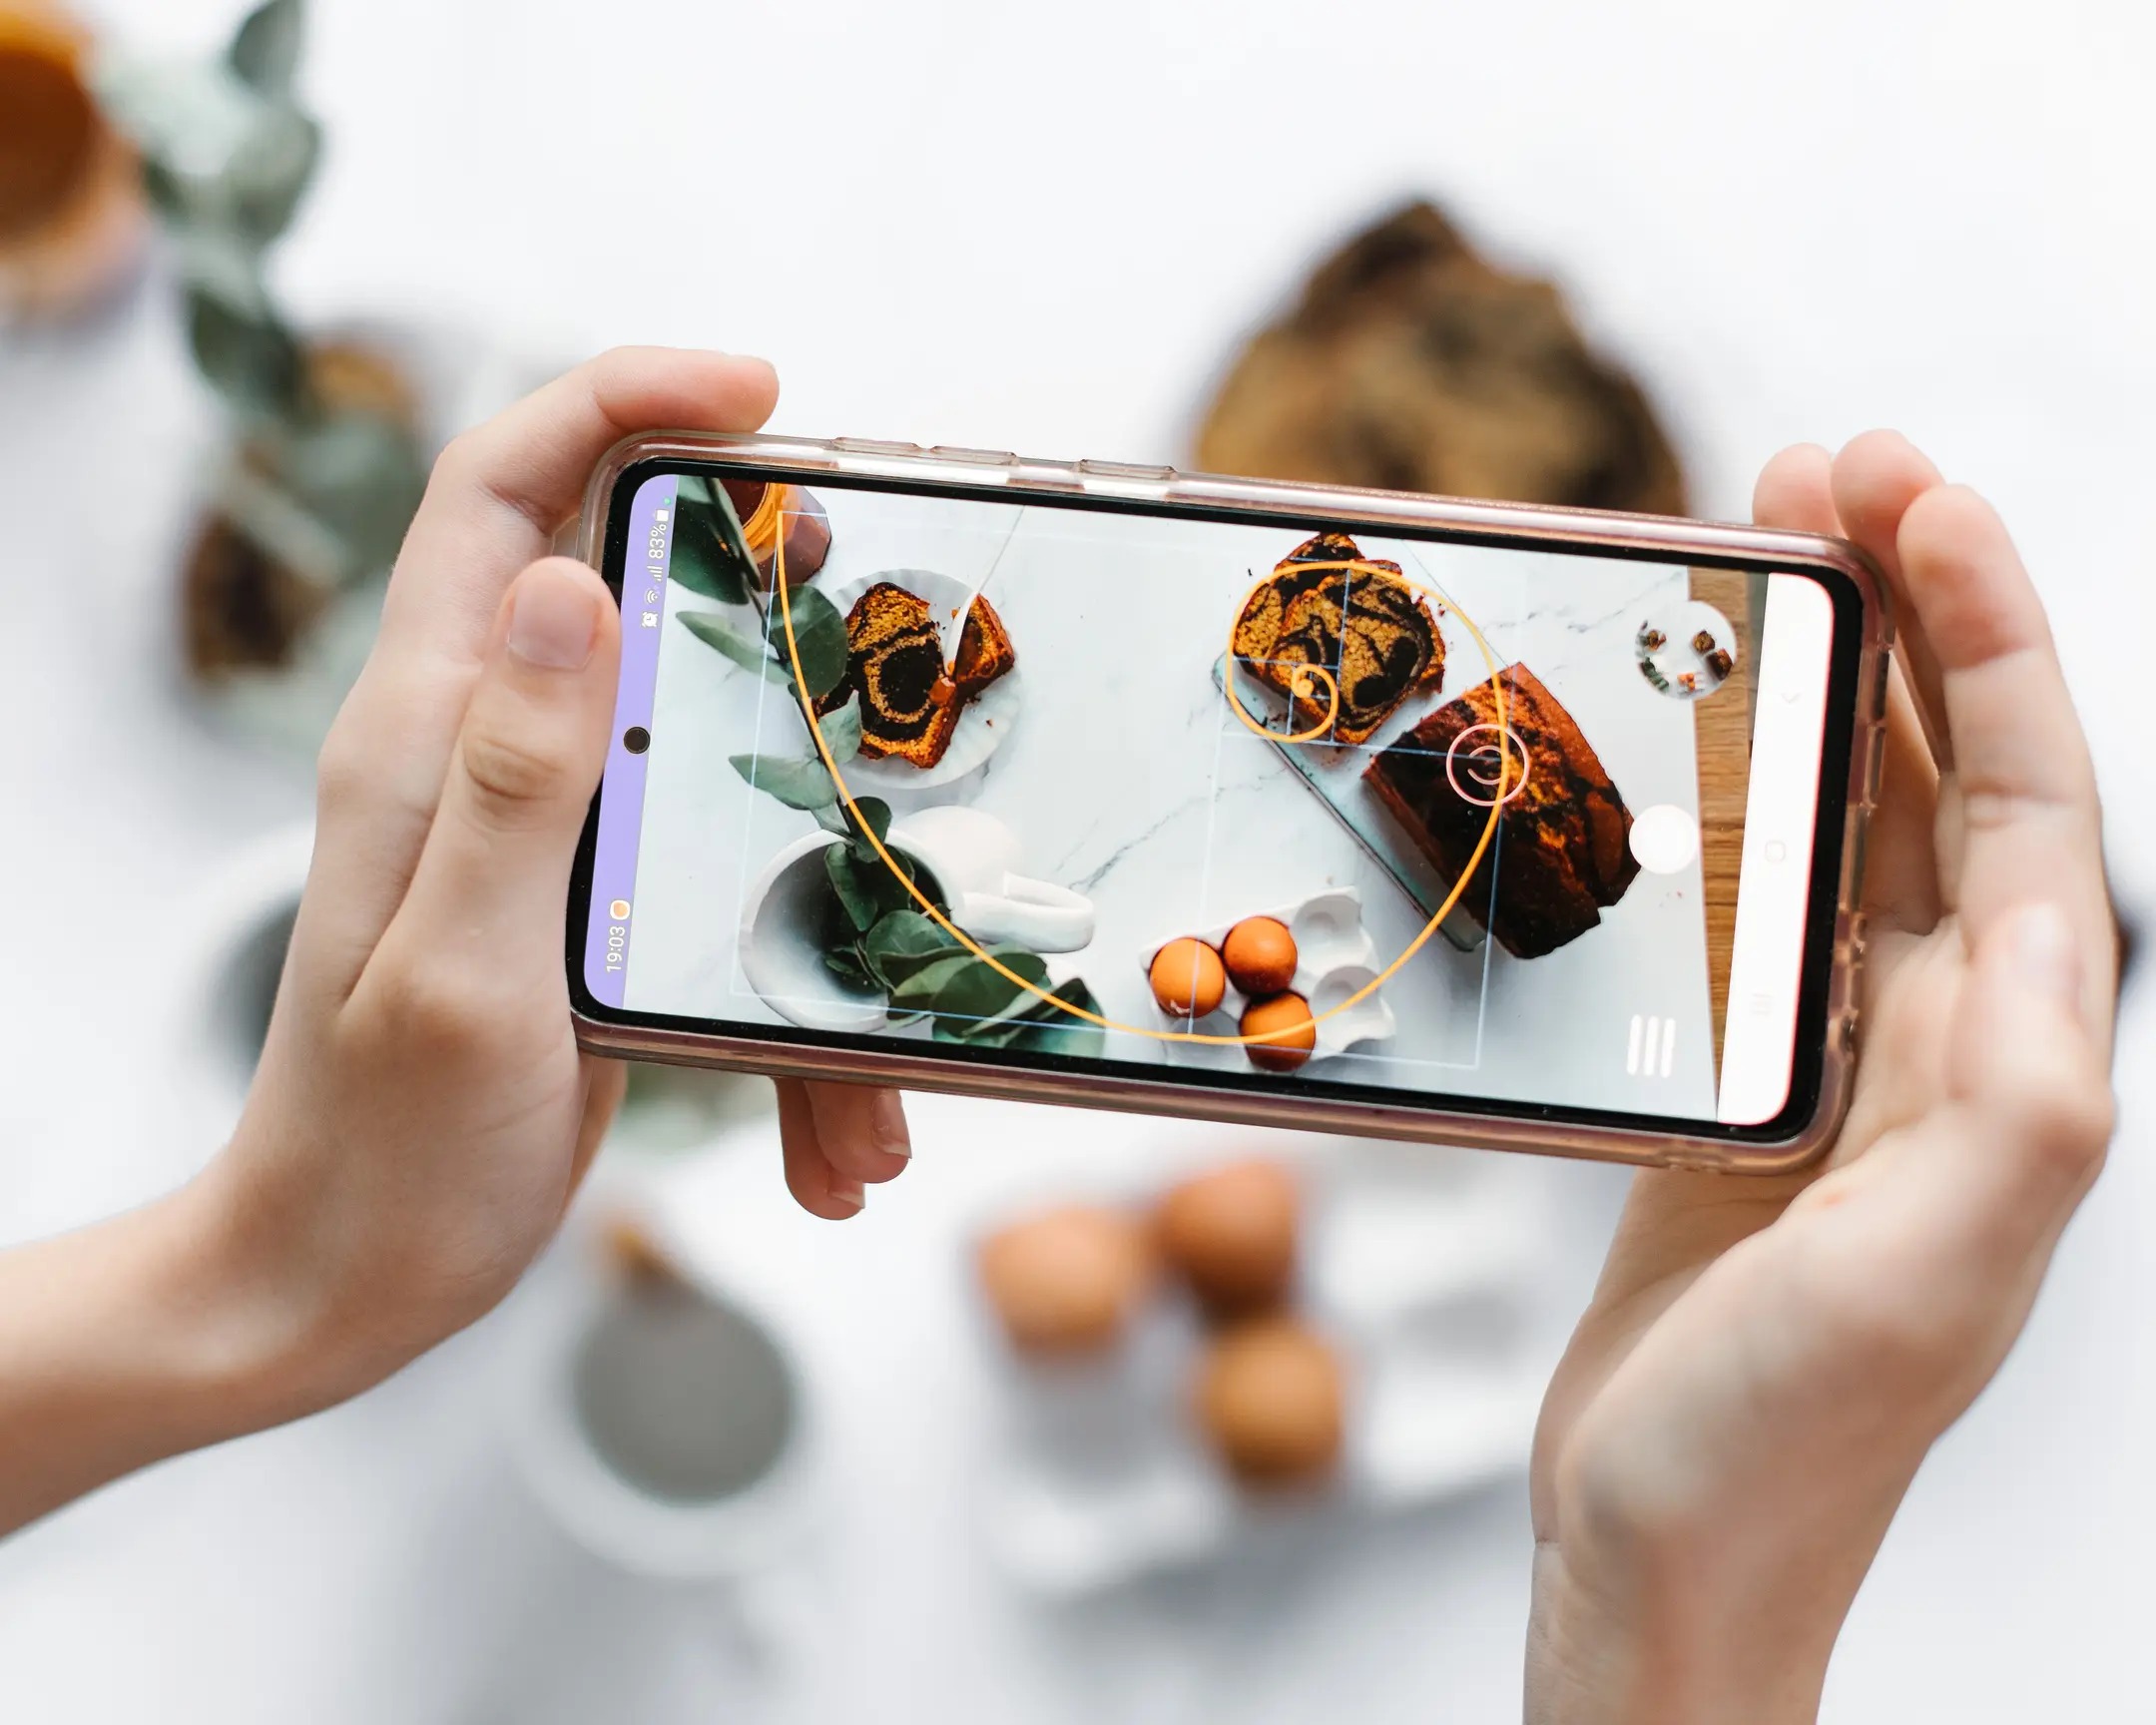
The rule of thirds is a classic photography technique that helps create balanced, eye-pleasing images. Most phone cameras have a grid setting — enable it.
Tip:
Position your subject along the lines or where the lines intersect. For example, place a person on the left third of the frame with the background filling the rest. This often looks better than placing the subject in the center.
5. Keep It Steady
Blurry photos happen when your hands shake. Even the slightest movement can affect the sharpness, especially in low light.
Tip:
Use both hands to hold your phone or lean against a stable object like a wall or table. If you’re shooting a lot, consider getting a small tripod or phone stand.
6. Avoid Using Digital Zoom
Zooming in with your fingers might seem handy, but most phones use digital zoom, which reduces image quality.
Tip:
Instead of zooming, move closer to your subject if you can. You’ll get sharper and more detailed photos. If you must zoom, crop the photo later while editing.
7. Experiment with Angles and Perspectives
Don’t just shoot from eye level. Explore different angles to add creativity and drama to your photos.
Tip:
Try taking a photo from a low angle looking up, or from above looking down. Crouch, lie on the ground, or stand on something safely. Unique angles can turn an average photo into something amazing.
8. Use Portrait Mode for People Shots
Most smartphones now offer portrait mode, which blurs the background to focus attention on the subject — just like DSLR cameras.
Tip:
Use this mode when taking close-ups of people, pets, or even objects like flowers or food. It adds a professional touch to your shots.
9. Don’t Overuse Filters or HDR
Editing apps and filters are fun, but over-editing can make photos look fake or too busy.
Tip:
Aim for natural colors and light edits. Adjust brightness, contrast, sharpness, and saturation slightly if needed. Most modern phones do well with automatic HDR (High Dynamic Range), but don’t rely on it too much.
10. Practice, Review, and Learn
The best way to get better at photography is to keep practicing. Take lots of photos, then go back and look at them critically.
Tip:
Ask yourself:
- What worked in this shot?
- What didn’t?
- How can I make it better next time?
There are also tons of free resources online — YouTube channels, blogs, and photography communities where you can learn and get feedback.
11. Edit Your Photos Thoughtfully
Editing is like seasoning in cooking — a little can enhance the flavor, too much ruins it.
Tip:
Use beginner-friendly apps like Snapseed, Lightroom Mobile, or VSCO. Adjust lighting, shadows, and colors subtly. Don’t aim for perfection; aim for authenticity.
12. Understand Your Phone’s Camera Settings
Each smartphone is a little different. Spend some time exploring your camera app — there may be hidden features like night mode, panorama, manual/pro mode, and slow motion.
Tip:
Try out each mode and see what kind of results you get. Manual mode, for example, allows you to adjust things like shutter speed and ISO, giving you more creative control.
13. Back Up Your Photos Regularly
You’re going to take a lot of great photos — make sure you don’t lose them.
Tip:
Use cloud storage apps like Google Photos, iCloud, or Dropbox to automatically back up your pictures. That way, they’re safe even if you lose or break your phone.
14. Tell a Story with Your Photos
The most memorable photos are ones that tell a story or capture an emotion.
Tip:
Look beyond just taking a “nice picture.” Think about what you’re trying to show — joy, adventure, love, curiosity. Include context in your shots (e.g., surroundings, expressions, action) to help viewers connect.
15. Have Fun and Experiment
Photography is both an art and a skill. Don’t get stuck on perfection — enjoy the process.
Tip:
Try different subjects: landscapes, portraits, food, architecture, or street scenes. Mix things up. You’ll learn more from experimentation than from any rulebook.
Conclusion
Smartphone photography doesn’t require a fancy camera or technical degree — just curiosity, patience, and a willingness to learn. With a few simple tips and regular practice, you’ll start noticing big improvements in your photos. The more you shoot, the more confident and creative you’ll become.
So next time you see something worth capturing, don’t hesitate — pull out your phone and click away. Your next great photo could be just one tap away.
FAQs: Photography Tips for Beginners Using a Smartphone
- What is the best free editing app for smartphone photos?
Snapseed by Google is a great free app. It’s user-friendly and offers a lot of powerful features like selective adjustments, filters, and cropping. - How do I make my photos look more professional?
Use natural light, follow the rule of thirds, avoid zooming, and edit gently. Also, try using portrait mode for portraits and explore angles creatively. - Can I take good night photos with my phone?
Yes, most modern smartphones have a Night Mode or Low-Light Mode. Hold your phone steady or use a tripod for better results in low light. - Is a phone tripod really necessary?
Not mandatory, but very helpful — especially for night photography, group shots, and videos. Even a cheap phone tripod can make a big difference. - Should I use the flash on my smartphone camera?
Only as a last resort. Flash can create harsh shadows and unnatural skin tones. Use natural light whenever possible or increase exposure manually.
Sign up with your email and always get notifed of zerodevicesnet Lifestyles latest news!


